A new roof often gets judged by what is easiest to notice: the color of the shingles, the straightness of the rows, and whether the edges look neat. Those details matter, but they reveal surprisingly little about the work beneath the surface. By the time a homeowner sees the finished result, several important layers have already been covered.
That hidden work is worth discussing before the first bundle of shingles arrives. A roof installation involves decisions about the condition of the wood, water protection at vulnerable points, and how the covering will stay secure. For someone preparing questions for Upright Roofing and Construction, understanding those decisions is more useful than memorizing roofing terms or comparing shingle colors alone.
There is no need to stand over a crew or inspect every nail. Instead, homeowners can learn what each stage accomplishes, ask for photos of details that will soon be concealed, and make sure the written scope reflects the work they expect. The following details explain why two roofs that look similar on completion can perform very differently over time.
The Surface Has to Be Ready Before It Can Be Covered
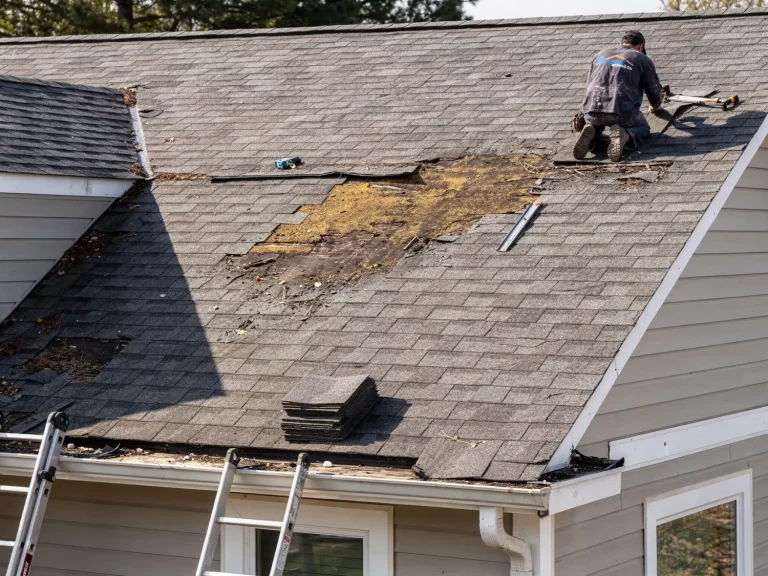
Removing old materials exposes the roof deck, usually made from plywood, oriented strand board, or boards in older construction. This is the base that supports the new covering and receives its fasteners. It needs to be suitable for the selected materials, not merely dry enough to look acceptable at a glance.
A crew might encounter a soft patch near an old vent, a loose panel edge, or nails left behind from previous work. These findings do not always mean large sections need replacing. The important question is whether the surface can support the specified fastening system and whether any damage has an identifiable cause.
Why Photos Before Covering Are Useful
Photographs taken after preparation can show repaired areas and provide context for changes to the original scope. If additional decking is required, ask where it is needed and how the amount was determined. It is easier to discuss a specific panel than to approve a vaguely described repair after the whole surface has disappeared under new materials.
Underlayment Gives Water Another Obstacle
Shingles are designed to shed rain, but they are not the only part of the water-management system. Underlayment sits between the deck and the outer covering, offering a secondary layer of protection. Its type and installation method depend on the roofing system, slope, and manufacturer instructions.
An overlap that faces the wrong direction, an unsecured section, or an incompatible material can undermine the intended protection. The layers need to work together so that water traveling down the roof is guided toward the edge rather than beneath the next course.
This is a helpful stage for a homeowner to ask Upright Roofing and Construction which underlayment has been specified and whether special protection is planned for areas that collect more runoff. The question is not about choosing the most expensive product. It is about understanding why a particular material fits the roof being built.
The Perimeter Does More Than Create a Clean Edge
At the eaves, rain moves toward gutters or the ground. At the rakes, wind can act on the edges of the covering. These areas often need appropriately detailed edge metal and starter materials to guide water and help the first rows resist lifting.
Starter shingles may look unimportant once the finished courses cover them. Their purpose, however, differs from that of the main shingles. They help establish the intended edge detail and sealing arrangement for the particular product. Using the correct components and following their required placement is more dependable than treating all shingle strips as interchangeable.
The order of underlayment and edge-metal placement also varies by location on the roof and the applicable system instructions. Rather than asking whether every roof follows one standard sequence, ask whether the planned detail matches the selected manufacturer’s requirements.
Valleys and Roof Openings Deserve Individual Attention
A broad, uninterrupted roof plane is comparatively straightforward. Challenges appear where surfaces meet or where pipes, chimneys, skylights, and walls interrupt the covering. A valley carries water from two slopes, while a pipe penetration introduces a gap that must be protected without blocking the intended drainage path.
These details should not depend on a thick bead of sealant holding everything together. Flashing, compatible accessories, and correctly ordered overlaps provide the principal protection. Sealants may be specified at particular points, but they are not substitutes for properly integrated materials.
Homeowners sometimes see a photograph of an exposed valley and wonder why it contains materials different from those used elsewhere. That is a worthwhile question. In a well-planned roof installation Coppell, TX project, areas with concentrated water or complicated transitions receive details suited to their particular demands rather than a one-size-fits-all treatment.
Fasteners Are Invisible Once the Job Is Finished
The fastening plan should be settled before roof installation begins, because nail placement affects how well the covering remains attached. A nail driven above the intended fastening zone may fail to secure the correct layers. A nail driven too deeply can damage the shingle. Product instructions also determine the required number and arrangement of fasteners, with additional provisions possible for certain conditions.
A homeowner does not need to count nails from a ladder, and should not enter an active work area to do so. A better question concerns the crew’s process for checking fastening patterns and correcting mistakes before the next course covers them.
Why Alignment Still Matters
Spacing and exposure affect more than appearance. If the visible portion of each shingle is too large or the courses are not placed as specified, the roof may not shed water or resist weather as intended. Straight lines are reassuring, but correct dimensions and product-specific instructions provide the more meaningful measure.
Ventilation Needs to Match the Building
A roofing project may also bring attention to intake openings near the eaves and exhaust vents higher on the roof. These components influence attic airflow, but adding more openings is not automatically an improvement. The correct arrangement depends on the attic design, insulation, air sealing, and whether the assembly is intended to be vented.
For example, insulation packed tightly against a soffit vent can interfere with the intended air path. Installing an additional exhaust vent without adequate intake may leave the underlying issue unresolved. Any proposal should explain the existing conditions and why the change makes sense for that home.
If ventilation is included in the project, ask Upright Roofing and Construction how the new components will connect with the existing attic arrangement. That keeps the conversation focused on the building as a whole rather than the number of vents visible from outside.
The Best Final Walkthrough Revisits the Hidden Work
Once cleanup is complete, ask for a short account of what happened at each major stage. Were there unexpected deck repairs? Which flashing details were replaced? Were any planned materials substituted? Keep product information, photographs, and written change approvals with the household maintenance records.
The value of a roof is not limited to how it looks on the day the last shingle is placed. A thoughtful roof installation depends on preparation, suitable materials, and the care taken at details nobody will see afterward. With Upright Roofing and Construction or any other provider, homeowners should expect clear answers about those less visible decisions. They make it easier to understand what was built and to maintain it responsibly in the years ahead.
About the Author