
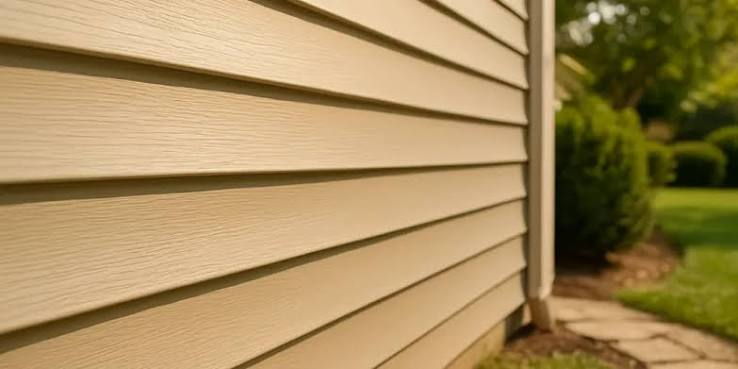
New siding can change the look of a house almost overnight. Old, faded boards disappear, the walls look cleaner, and window trim stands out again. That makes it especially disappointing when a few weeks later the homeowner notices ripples across one wall, a gap beside a window, or a panel that no longer sits in line with the others. Those details can be hard to ignore once the fresh appearance wears off.
Not every variation means the job was done badly. Some siding materials expand and contract as temperatures change, while older houses may have walls that were never perfectly flat. Still, a proper siding installation should account for both conditions. Homeowners researching All-Side Roofing & Restoration alongside other exterior specialists can make better decisions by learning which changes are expected and which deserve a closer look.
The key is to understand what holds siding in place, how it moves, and what lies behind it. A straight-looking finish on the day of installation tells only part of the story. The way panels behave through hot afternoons, cool nights, and rainy weather reveals much more.
Why a Wall Can Look Wavy Even With New Materials
Before siding goes on, the wall beneath it may already have uneven spots. Older framing can shift slightly over time, and replacement sheathing may sit at a different level from nearby boards. Some materials follow these imperfections closely, so a dip in the wall becomes a visible shadow along the finished surface.
Long walls make these differences easier to notice. Morning light across one section may hide them, while low evening sunlight creates sharp lines that reveal every bump. A homeowner might think a panel has suddenly warped when the issue was present from the start but became more visible at a different angle.
Preparation Should Come Before the First Panel
A contractor should assess the underlying surface and identify defects that affect the finished appearance or performance. Depending on the siding system, preparation may involve repairing damaged sheathing, correcting protruding fasteners, or using an approved method to create a more even surface. Simply covering soft or deteriorated wood with new siding does not make the wall sound.
Ask how irregular areas will be handled before work begins. The goal is not to promise that an older home will become geometrically perfect, but to make sure obvious problems are discussed rather than hidden beneath a new covering.
Panels Need Room to Move
Vinyl siding is designed to expand in warmer temperatures and contract as it cools. When it is fastened too tightly, the panel may have nowhere to move. Instead of sliding slightly as intended, it can buckle or develop a wave between attachment points.
The same general concern applies at corners, trim channels, and openings. A panel cut too close to an obstruction may push against it as the material expands. A panel cut too short can expose a noticeable gap during cooler weather. The correct clearances depend on the product and the manufacturer’s instructions, not one universal measurement.
The Fastener Is Not Supposed to Clamp Every Panel
Many vinyl systems use slotted nail hems so the siding can move beneath the fasteners. Nails or screws that pinch the panel tightly can interfere with that movement. Fasteners placed outside the intended slots or driven at an angle can create similar trouble.
These details help explain why a newly finished wall might look smooth in the morning and wavy later in the day. A homeowner should not try to correct the problem by pulling, drilling, or adding more nails. That can damage the panel and complicate a repair. The installer should examine how it was attached and whether the material is free to move as designed.
Gaps Around Windows Are Not Always the Same Problem
The edge of a siding panel usually disappears into a trim channel, corner post, or other receiving piece. A small amount of movement space can be intentional. An exposed opening, however, may indicate a panel that was cut incorrectly, slipped out of position, or was fitted with the wrong trim detail.
Look closely at where the opening occurs. Is the panel still captured by its trim? Does the gap change with temperature? Is there staining or moisture beneath the window? These observations help distinguish a cosmetic alignment issue from a concern about water management.
Siding is not the building’s only defense against rain. Flashing, the water-resistive barrier, and correctly detailed window openings provide protection behind the outer surface. When discussing siding installation with All-Side Roofing & Restoration or another provider, ask how those layers will be handled rather than judging the work only by its visible caulk lines.
Different Materials Reveal Different Mistakes
A wave in vinyl does not necessarily have the same cause as a warped wood board or an uneven fiber-cement plank. Material choice affects fastening requirements, joint spacing, moisture sensitivity, and acceptable installation practices. Applying the habits used for one product to another can lead to trouble.
Wood siding can swell, cup, or split if moisture conditions and finishing details are poorly managed. Fiber-cement products are relatively stable but still require correct clearances, support, fastening, and joint treatment. Engineered wood has its own edge-sealing and installation requirements. In every case, the specific manufacturer instructions should guide the work.
During siding installation, decisions about joint spacing and fastening should follow the exact product instructions, especially when different materials meet on the same wall. This is why homeowners should ask what product is being installed, not just what color it will be. The exact profile and material determine how installers should treat corners, openings, joints, and transitions near the foundation or roofline. One worthwhile question for All-Side Roofing & Restoration is how the chosen material changes the preparation and finishing methods, rather than assuming every product goes on the same way.
Moisture Problems Can Hide Behind a Neat Finish
A wall may look straight while water is entering behind the siding. Poorly integrated flashing at a window, damaged house wrap, or missing drainage details can let moisture reach the sheathing. The exterior might show little change at first, even while the materials underneath remain wet.
Warning signs can include swelling near a joint, persistent damp patches, soft trim, or paint that keeps peeling in the same location. These symptoms do not prove that the siding itself is the cause. Water might be entering from above or through a separate opening. The important point is to investigate the source before replacing isolated panels.
For a wall that repeatedly shows moisture damage, a reliable assessment may require removing a small section to inspect the layers beneath. Photographs of the exposed conditions and a written explanation of any proposed corrections are more valuable than a vague promise to seal the area again.
What to Check Before the Crew Leaves
Walk around the house from several angles while there is still an opportunity to discuss the finished work. Look for consistent panel alignment, secure corner details, clean transitions around doors, and trim that appears properly fitted. Check that vents and exterior fixtures have been handled according to the siding system rather than awkwardly cut around.
Ask the installer to explain any visible gaps and identify which ones are intentional expansion clearances. Find out whether damaged sheathing was discovered and how it was repaired. Keep the product name, color information, warranty documents, and final scope of work for future maintenance or repairs.
Do not expect every minor shadow line to disappear, especially on an older structure. What matters is whether the result matches the agreed scope and follows the material’s installation requirements. If something appears questionable, bring it up while the details are fresh instead of waiting until a noticeable defect gets worse.
A Good Finish Depends on What Happens Behind It
Waves, gaps, and uneven panels are not all signs of the same failure. Some reflect the shape of the original wall, some come from restricted movement, and others point to trim or moisture-management details that need attention. Correcting the cause matters more than forcing a panel to look flat for a photograph.
Successful siding installation begins with careful preparation and ends with a finish that can handle normal movement and weather. Whether a homeowner is reviewing a proposal from All-Side Roofing & Restoration or discussing concerns with another exterior professional, specific questions about fastening, clearances, drainage, and the substrate are worth asking. Those details determine whether the improved appearance lasts beyond the first day.
About the Author