
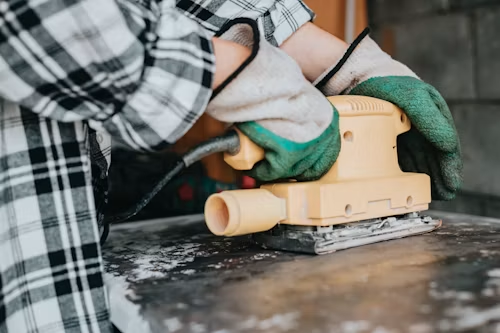
Sanding drywall creates a fine layer of powder that can quickly spread beyond the work area. A wall sander connected to dust collection tackles that problem while you smooth joint compound, plaster, or painted surfaces. Instead of allowing loose particles to fall and float around the room, the sanding head pulls much of the debris toward the collection system. This makes the work area easier to manage and helps you see the surface as you sand.
A drywall sander with vacuum is especially useful when working on large walls and ceilings. The combination of a powered sanding head and suction reduces the amount of loose dust that escapes from the sanding area. It does not make sanding completely dustless, but a well matched system can greatly reduce airborne debris and cleanup.
How Vacuum Assisted Sanding Works
The basic idea is simple. A sanding disc removes small amounts of material while air is pulled through openings around the sanding head. The loosened particles travel through a hose and into a collection bag, dust container, or vacuum instead of spreading across the room. A shroud around the sanding head also helps keep the airflow close to the surface.
Dust control depends on more than suction alone. The hose needs a secure connection, the collection system needs suitable filtration, and the sanding head needs to stay reasonably close to the wall. Fine drywall particles can escape when there are gaps, blocked filters, loose fittings, or weak airflow.
Why Dust Collection Matters When Sanding Walls
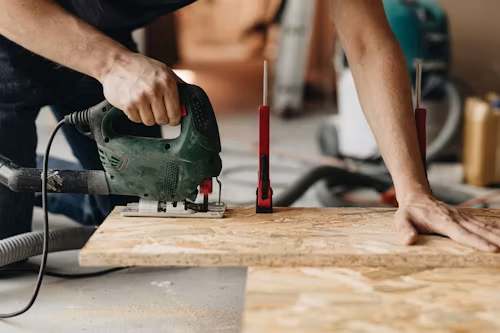
Drywall dust is extremely fine and can settle on floors, furniture, tools, and other surfaces. It can also make it harder to judge the quality of your sanding because airborne particles create a hazy work area. Capturing dust at the sanding head with a drywall sander with vacuum reduces the amount that has a chance to spread. That means less time spent cleaning the room after the surface is ready.
There is also a practical benefit during the sanding process. When less dust builds up around the work area, you can inspect the wall more easily and spot ridges, low areas, scratches, or uneven patches. A clean view helps you decide where another light pass is needed instead of sanding blindly. Dust extraction therefore supports both cleaner work and better surface control.
Choose the Right Vacuum Setup
Not every vacuum works equally well with a powered sander. Fine dust requires a collection system with suitable filtration and enough airflow to maintain suction during continuous sanding. A HEPA rated filter can be useful when controlling very fine particles, especially for indoor renovation work. The vacuum should also have a hose and connection that fit the sander without creating unnecessary restrictions.
Check the dust port before connecting the equipment. A loose adapter can leak air and allow dust to escape around the connection. A hose that is too long, narrow, or sharply bent can also reduce airflow. Keep the setup as direct as practical and make sure the hose does not interfere with movement while sanding.
Look for Adjustable Sanding Speed
Different surfaces need different levels of sanding pressure and speed. Joint compound may require a lighter approach than thick texture or old paint. Variable speed lets you slow the sanding action when working near finished areas and increase it when more material needs to be removed. This control can make a powered sander easier to handle.
Higher speed is not always better. Moving too aggressively can remove more material than intended or leave marks that require additional finishing. Start with a moderate setting and adjust it after checking how the abrasive behaves on the surface. Professional testing also shows why variable speed can be important when moving between aggressive material removal and finer finishing work.
Consider the Sanding Head and Disc Size
The shape and movement of the sanding head affect how easily the tool follows a wall. A larger round pad can cover more surface with each pass, which is useful on broad walls and ceilings. Some powered models also use flexible or pivoting heads to help maintain contact as the tool changes angle.
The abrasive itself matters just as much. Coarser grits are useful when removing heavier material, while finer grits are better suited to final smoothing. Many drywall sanding systems support a broad range of abrasive grades, allowing one tool to handle both rough preparation and finishing work.
Reach Makes Ceiling Sanding Easier
Sanding high areas by hand often means using a ladder, moving it repeatedly, or stretching to reach the surface. A long handle can keep your feet on the floor while allowing the sanding head to reach higher sections. This is useful for ceilings, tall walls, stairwells, and other difficult areas.
An adjustable handle can be even more practical because you can change the length according to the task. However, longer reach can also increase leverage and make a tool feel heavier. Look for a design that balances reach with manageable weight so you can keep steady control during repeated passes.
Use Lighting to Find Uneven Areas
Some sanding tools include a light near the sanding head. This can help reveal small ridges, depressions, and surface imperfections that may be difficult to see under ordinary room lighting. Good visibility becomes particularly useful during the final passes before painting.
Lighting is helpful, but it does not replace proper sanding technique. Move the head evenly and inspect the surface from different angles. If a section still looks uneven, apply another controlled pass rather than pressing harder on the tool.
Use the Right Technique for Better Dust Control
Start by preparing the room and removing objects that could be affected by dust. Secure the vacuum hose and check that the collection system is working before putting the sanding head against the surface. Hold the tool steadily and move it across the wall in controlled passes. Avoid staying in one spot for too long because powered sanding can remove material quickly.
Let the abrasive do the work instead of forcing the head against the wall. Excessive pressure can reduce the effectiveness of the sanding movement and may create uneven areas. Keep the sanding head moving at a consistent pace, especially around seams and repaired sections.
When a Wall Sander Is Better Than Hand Sanding
Hand sanding still makes sense for small repairs and tight spaces. It gives you direct control and does not require a powered tool or vacuum setup. For an entire room, however, manual sanding can become slow and physically tiring. Large surfaces are where a powered wall sander can provide a clear advantage.
Powered sanding also helps when ceilings or high walls are involved. The extended handle reduces the need to repeatedly reposition a ladder and can cover broad sections more consistently. For small patches, a manual sanding block may still be quicker, so the right choice depends on the size and shape of the project.
Keep the Vacuum System Maintained
Dust collection works best when the vacuum and hose are kept clear. Check the filter regularly and empty the collection container or bag before it becomes too full. A clogged filter can reduce airflow and make dust extraction less effective. Inspect the hose and fittings as well because small leaks can affect the entire system.
The sanding head should also be checked between jobs. Remove built up material from the pad and replace worn abrasives when needed. A clean sanding surface cuts more consistently and helps maintain predictable results.
Is a Drywall Sander With Vacuum Worth Using?
For large drywall projects, the main benefit is the combination of sanding power and dust control. A drywall sander with vacuum can reduce airborne debris while helping you cover walls and ceilings more efficiently. The result depends on the quality of the sanding head, vacuum, filtration, hose connection, abrasive, and technique.
It is not a replacement for good preparation and careful finishing. You still need to inspect the surface, choose an appropriate abrasive, and avoid removing too much material. But when the equipment is properly matched, vacuum assisted sanding can make a messy part of wall preparation much easier to manage.
Final Tips for Cleaner Wall Sanding
Before starting, check the sanding disc, dust hose, vacuum connection, and filter. Use a moderate speed until you understand how quickly the tool removes material. Keep the sanding head moving and avoid applying unnecessary pressure. After each section, inspect the wall under good lighting before deciding whether another pass is needed.
The best results come from treating dust control and sanding techniques as one process. Good suction captures particles at the source, while the correct abrasive and steady movement produce a smoother surface. With the right setup, you can spend less time dealing with scattered drywall dust and more time getting the wall ready for its final finish.
FAQs
Does a wall sander remove all drywall dust?
No. A good vacuum system can capture much of the dust, but some particles can still escape during sanding, hose movement, filter changes, or cleanup.
Can a drywall sander connect to a shop vacuum?
Many models are designed for vacuum connection, but compatibility depends on the dust port, hose size, adapter, and vacuum airflow.
What grit should I use for drywall sanding?
Use a coarser grit for heavier material removal and a finer grit for finishing. The right choice depends on the condition of the surface.
Is a vacuum sander useful for ceilings?
Yes. A powered sander with an extended handle can make ceiling work easier by reducing the need to reach or repeatedly reposition a ladder.
Why is my vacuum not collecting enough sanding dust?
Check for a clogged filter, full collection bag, loose connection, blocked hose, or poor adapter fit. Restricted airflow can reduce dust capture.
About the Author